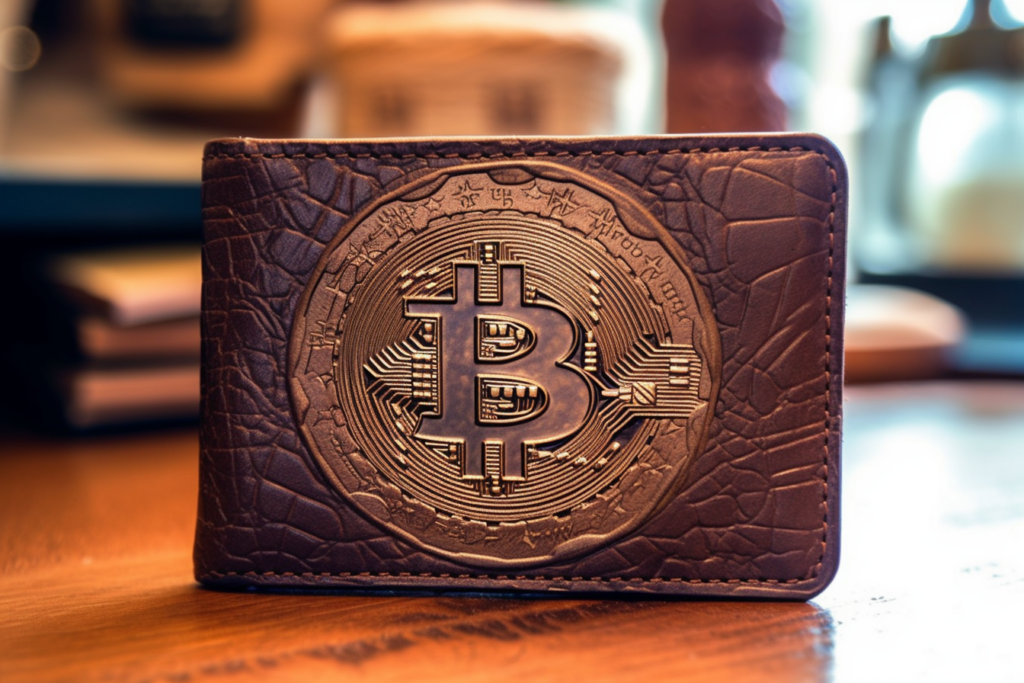
You’ve bought your first bitcoin and the first thing your bitcoiner friend told you is to HOLD YOUR OWN KEYS! But being responsible for your own bitcoin is a little scary. Maybe you can start with an easy wallet to use, so what are the best bitcoin wallets for beginners?
There are a ton of different bitcoin wallets out there, and many of them are great for beginners. Which bitcoin wallet you decide to use will depend on how much bitcoin you have, how you plan to use bitcoin, and personal preferences for style. Each wallet has a unique set of features and user experience, so explore your options and maybe even buy two or three for testing before making your final decision.
It does take a little bit for beginners to get comfortable with a wallet experience, and switching later can be a little annoying, so I recommend testing out a few if you are serious about self custody of your bitcoin.
5 Best Bitcoin Wallets For Beginners
Choosing the best bitcoin wallets for beginners comes with a bit of nuance. First have to define what a bitcoin “wallet” actually is. There are several different ways to secure your bitcoin, and the term wallet isn’t always appropriate.
What Is A Bitcoin Wallet?
A “bitcoin wallet”, contrary to what it sounds like, doesn’t actually store your bitcoin. A bitcoin wallet is a piece of software or hardware that holds the keys to your bitcoin, and interacts with the bitcoin network. A bitcoin wallet allows you to send and receive bitcoin, but the bitcoin doesn’t actually live on the device.
To demonstrate this, you can actually physically destroy your bitcoin wallet, and as long as you have a copy of your keys backed up. Even with the physical bitcoin wallet smashed or melted, or a software wallet wiped from your computer/phone, you can easily restore the wallet by entering your private key into a new wallet.
Imagine having $100 in cash in your normal wallet, lighting it on fire, then being able to regenerate those $100 if you had the right code. Pretty cool, right?
For this reason, some bitcoiners have begun to call bitcoin wallets what they really are – bitcoin signing devices. They essentially hold the keys allowing you to move some amount of bitcoin. When you sign a transaction, you give the bitcoin network permission to move the bitcoin, and tell it where to go.
However, this has really only caught on among some of the more hardcore bitcoiners, and it’s much more common to stick with what’s been working for more than a decade: bitcoin wallet.
If all of that is that’s too confusing, you can still think of a bitcoin wallet like a normal wallet, but just be aware that the analogy isn’t perfect.
Why Is A Bitcoin Wallet Important?
A bitcoin wallet is important because it secures your private keys in a way that allows you to access your bitcoin, but doesn’t allow other people to steal your bitcoin. A bitcoin wallet allows you to interact with the bitcoin network. You can generate new addresses to receive coins, label transactions so you can remember where they came from, send bitcoin to other users.
What Are Private Keys?
I’ve mentioned “private keys” a few times in this article so far, so let me explain briefly what private keys are. It’s important to understand what a private key is, so you can understand why it’s important that you use a quality wallet to generate your keys.
A bitcoin private key is a random number that is so long and so random, that nobody can guess it. Private keys are used by the bitcoin network in such a way that only someone who knows this key is able to move a specific amount of bitcoin.
A random number as generated by the bitcoin network is impossible to remember, so early bitcoiners devised a system that allows us to convert that number into a 12 or 24 word combination of words. That way, instead of remembering a 64-character number, you can simply remember 12 words. That’s a lot easier, right?
Because a bitcoin private key is a combination of words, it’s often called a seed “phrase” or seed words. Most people start by writing them down on a piece of paper, but progress to etching them in steel as the value of their bitcoin increases.
By using a quality bitcoin wallet, beginner bitcoiners can be sure that their private key was generated properly and securely, so that nobody can access their key and steal their bitcoin. It’s incredibly important to store your key in a safe place, because there are not “backups” of your key stored on a company server. You, and only you have access to your seed phrase!
What Type Of Bitcoin Wallets Are There?
Bitcoin wallets can be broken down into two basic categories, software and hardware.
Software Wallets
A software wallet would be a wallet app that you use on your phone or computer. You need to download the software, run the app, and it’ll generate keys for you. You’ll need to write down those keys on a piece of paper or etch them in steel because if the software gets deleted and you don’t have your seed backed up, you won’t be able to access your bitcoin.
If you lose your phone or have to do a hard reset, you’ll need those words to recover your bitcoin. Many times, even transferring your data to a new phone will require that you re-enter your private key into the wallet app.
Hardware Wallets
A hardware wallet is a specialized piece of hardware designed specifically to generate private bitcoin keys and sign transactions. That’s its only job. This device can often be locked with a pin, meaning an attacker would have to hack the pin to even open the device, assuming the attacker would even know its location!
Hardware wallets are considered more secure because keys are generated and stored offline, and the signing happens on a specialized device which often uses a secure element. Software wallets are much more convenient since they are often run on your everyday computer or phone, but come with additional security risks due to being easily accessible.
Your Hardware Needs Software!
What’s important to note here is that your hardware wallet will need software to interact with the wallet. Some hardware wallets come with a companion software made by the same company. Some do not. Both hardware wallets I recommend for beginners have a companion software for either desktop or mobile. You do not have to use the companion software, and can choose your own software, as long as it supports the hardware wallet.
For mobile, the most popular mobile apps that support multiple types of hardware are Green Wallet, Blue Wallet, and Nunchuk. For desktop, the most popular apps that support multiple hardware wallets are Sparrow, Specter, and Green Wallet.
Bitcoin For Beginners
If you’re enjoying learning how bitcoin wallets work, please check out my Bitcoin For Beginners article, which covers the basics of why bitcoin has value, how to buy bitcoin, and how to secure your bitcoin.
Related Content
1. Trezor Model T / Trezor Suite
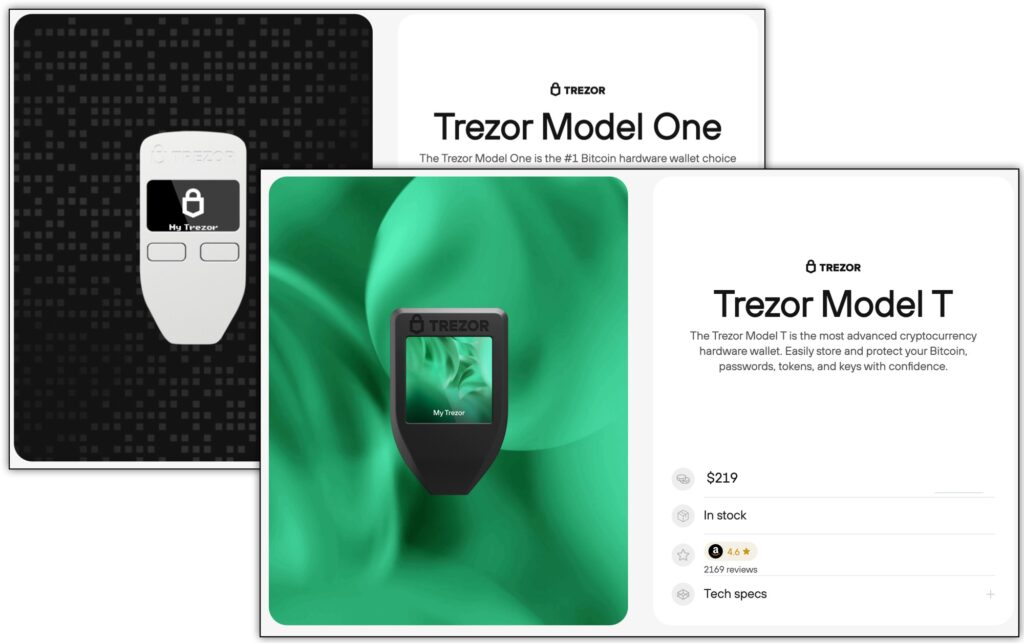
Some bitcoiners will give me shit for this one, but I’ll list it here because honestly, it’s what I used for many years in my early days as a bitcoiner. There are some issues to be aware of, but I think for beginners users, the Trezor software and hardware comes with some decent tradeoffs.
Trezor One VS Model T
Trezor One is the simpler, cheaper bitcoin hardware wallet, while Trezor T is the more advanced and feature-rich version. They both use the Trezor Suite software, but the hardware is slightly different.
The Trezor One is a great introductory hardware wallet, with a low-commitment price of just $69. If you only have a few million sats to put in cold storage, then it makes sense to go with a cheaper hardware wallet.
For beginners, the Model T is a lot more user friendly in that it has a touch screen. As a frequent user of Trezor devices, it makes a huge difference when you are trying to put in a pin or confirm information on the device. The larger device is also more comfortable to hold.
Trezor supports many types of cryptocurrencies, but they have bitcoin-only firmware you can install, which I recommend using.
The Trezor Suite Software
I’ve always found the Trezor Suite desktop app to be very intuitive and easy to use for beginners. It’s clear how much bitcoin you own, how much it’s worth, and how to send and receive bitcoin. Those are the main things you need from a basic bitcoin wallet as a beginner.
The second most important thing as a beginner in my opinion is UTXO management and coin control, which is also easy to find and simple to use. For every transaction you receive you can click and add a label to it, so you can later remember where that bitcoin came from. This helps with UTXO management. UTXO management can be important for privacy and saving on fees when using bitcoin!
Pros Of The Trezor Stack
I can say that my beginner experience with Trezor tools was flawless. I tried quite a few different wallets in the beginning, and Trezor was by far the easiest to use. Now, as an intermediate user I have some more nuanced opinions and use a different setup, but I frequently interact with Trezor through friends and family. The Trezor onboarding process and work flow never disappoints.
With Trezor it was super easy to set up different wallets, track my holdings, send and receive bitcoin, and explore some of the more advanced settings.
They have the bitcoin-only software you can install to replace their multi-coin software, and they are open source, meaning there are tons of eyes on the Trezor code at all times. Plus, as one of the most popular hardware wallets, they are continually scrutinized under a microscope.
Cons Of The Trezor Stack
Even though I like Trezor, to be honest, it’s not a favorite wallet of many bitcoiners. Their main wallet software supports a TON (over 1000) altcoins, and their new coinjoin feature results in a portion of your funds supporting blockchain analytics companies. There is also no secure element in Trezor devices, and there are known physical exploits to extract seed phrases.
I also found it very difficult to connect to my own node using Trezor Suite. You can’t just scan-and-go like many bitcoin wallets. With Trezor, there are extra steps. Though the tutorials seem quite straightforward, it’s like 90% bitcoin jargon, and impossible to follow as a beginner bitcoiner.
You can use the Trezor hardware in combination with other software which makes this process easier, but out of the box it’s just not going to happen for most people. For example, if you are running an Umbrel node, the Spectre Desktop app will automatically connect to your own node without changing any settings.
Most newcoiners won’t run their own node in the beginning, so it’s not a dealbreaker for most, but it’s something to keep in mind if you eventually want to run your own node.
No Secure Element:
I was a little surprised to find out that Trezor didn’t use a secure element, but I understand their logic. Trezor basically makes the point that secure elements are quite secretive in how they work, making it impossible to verify anything about them. To be truly open source, everything needs to be viewable, reproducible, and executable, which would not be possible with a secure element.
They are not the only hardware wallet which has made this tradeoff. The Blockstream Jade and the SeedSigner both opted out of using a secure element to store your seed, and each of them deal with private key security in a different way. Trezor’s main recommendation at this point is to use a passphrase, essentially creating a “hidden wallet” that would be invisible to attackers even if they extracted your seed.
Physical Exploits:
There have been, and currently exist, one or two known physical exploits of Trezor devices. After hearing something like that, you may be afraid to use a Trezor when there are so many other hardware wallets available. However, once I explain the nuance of these exploits, I think you’ll understand why I still recommend Trezor to beginners.
The main thing to understand is that these exploits require specialized equipment in addition to physical access to your Trezor in order to compromise the device. These physical exploits of Trezor were done by profession cybersecurity firms, not hacked in the wild by everyday criminals.
What’s more, if you implement a pin and a strong passphrase (secret wallet), then the exploits are not effective. Combined with common sense like not bragging about your bitcoin holdings in public and having a good spot to hide your physical device, this sort of threat model is highly unlikely to affect you.
2. Passport / Envoy
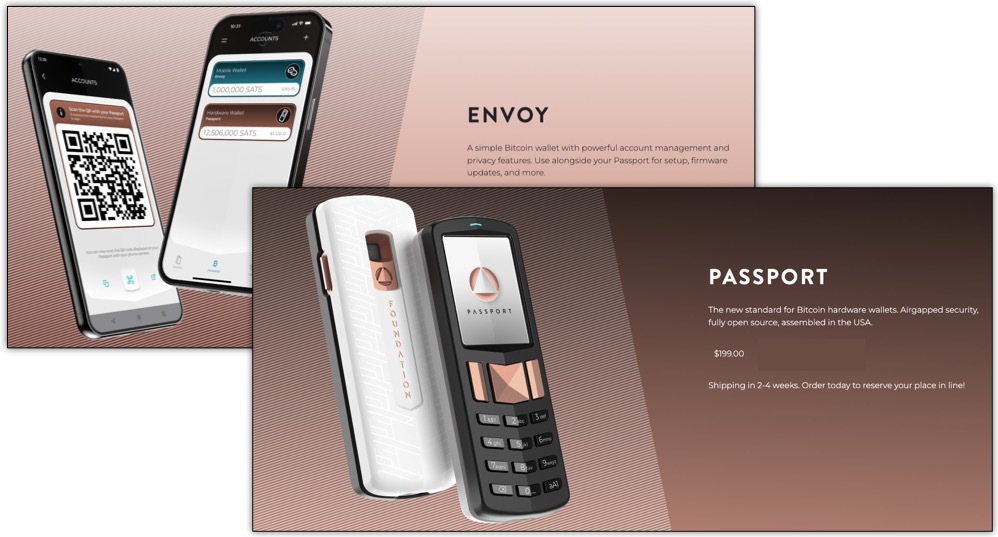
Passport is simply the most intuitive and user friendly hardware wallet on the scene, without a doubt. The two things that make is so simple is the push-button keypad designed like a phone, and the QR scanning for “airgapped” signing, i.e. signing bitcoin transactions without connecting to the internet.
When setting up the Passport to connect to its companion mobile app Envoy, everything went smoothly the first time, and I was able to receive/send bitcoin within a few minutes of setting up the wallet.
The fact that I didn’t have to troubleshoot anything or learn any new software to get going with bitcoin cold storage is a big deal for beginner bitcoiners. There are plenty of debates about security tradeoffs of this or that wallet, but just getting your bitcoin off of exchanges is an important first step. This is why I’m so enthusiastic about recommending Passport.
Of course no wallet is perfect, and my main issue with Passport is that it had me encrypt my backup to a microSD card instead of writing down my seed phrase. If your microSD card gets lost or corrupted, then your funds are gone. The same goes with your seed phrase, but with an encrypted backup, you still need a Passport device to decrypt it! With a seed phrase, any wallet can restore your funds. The seed phrase is in your Passport, you just need to know what you’re looking for and write it down.
There is no Envoy desktop app yet, but you can use Passport with a variety of bitcoin software to use bitcoin on your desktop if you want to do that, or you can use your Passport as part of a multisig quorum.
Pros Of Passport + Envoy
The Foundation Devices Passport bitcoin wallet was super easy to set up and get going. Hands down one of the smoothest and fastest experiences of setting up a new bitcoin wallet.
Passport also has a removable lithium ion battery with a good battery life, meaning you can charge it and use it on the go as a mobile signing device. You can also have multiple batteries for easy swapping.
Additionally, with Passport, you have the option to sign a transaction using QR codes and the camera, or you could use a microSD card. Passport is currently the only device with both options, as bitcoin hardware wallets usually opt for just one.
Cons Of Passport + Envoy
Passport is on the higher end of pricing, and if you get the pin wrong too many times you can brick the device. I honestly don’t know why they wouldn’t just wipe it and allow you to restore your seed, but just don’t f-up your pin or you’re out $199.
As mentioned above, I wish they would introduce the seed phrase more explicitly when setting up a wallet.
Coin Control And Custom Fees
My issues around Passport and Envoy mostly are with Envoy, so it’s important to remember you don’t have to pair a Passport with the Envoy app. You can use a variety of other bitcoin apps out there by exporting your public key to the wallet.
With Envoy, I didn’t like that I couldn’t set a custom fee rate and had no idea what rate I was paying. I knew the exact number of satoshis I was paying, and could choose “normal” or “boost”, but I couldn’t see if the fees they were asking me to pay were actually in line with what was being charged on the network. There are many cases of people paying 2x, 3x, or more, and some people are willing to wait a week for a transaction to go through if they save a bit of money.
I also didn’t like that I couldn’t do coin control in the Envoy app. This means any funds you send to Envoy will be mixed with all your other coins, comingling the coin history. It’s bad for privacy, and can cost you more money sometimes.
These could be considered advanced features however, so for a beginner bitcoiner, you probably wouldn’t miss them. Just something to be aware of.
3. Phoenix (Mobile)
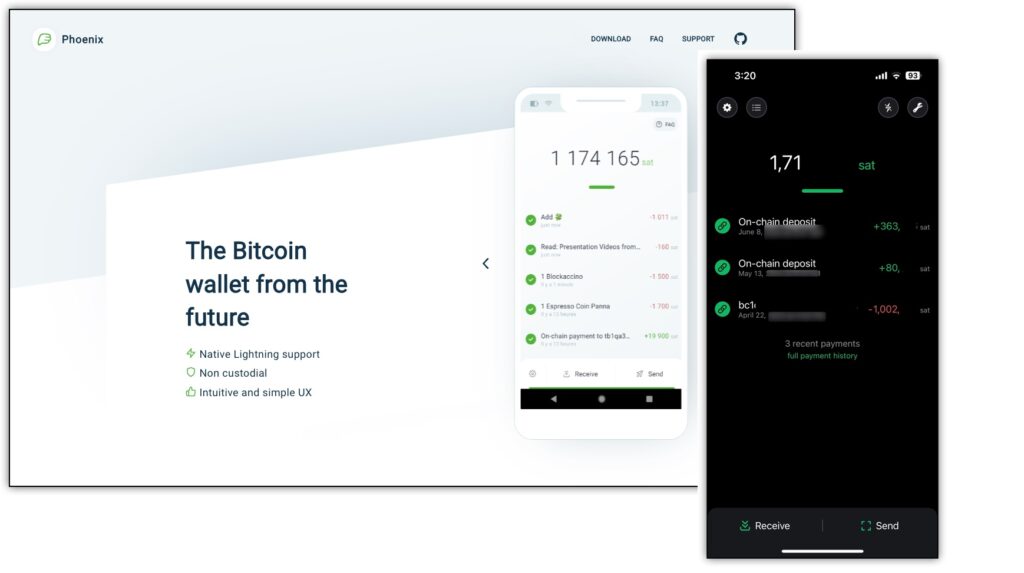
Phoenix Wallet is a great lightning wallet because it’s a lightning wallet that also allows for self custody of your funds. Without going into the weeds too much here, lightning is a faster and cheaper way to use bitcoin, but requires that you do some wallet setup and funds management stuff that makes it hard for beginners to adopt.
(There are some wallets that make lightning super easy to use, but typically custody funds for you, meaning they could rugpull you at any moment. It’s not smart to keep too much money on that type of wallet!)
The problem Phoenix solves is that each bitcoin deposit you make into the wallet swaps into a lightning channel, effectively making it so you can hold your own keys and send lightning payments, without worrying about the complex funds management of self-custody lightning wallets.
It’s the best of both worlds. You get to secure your bitcoin with your own backup, but also send lightning bitcoin for fast and cheap. Everything is on mobile, so this wallet can be a daily driver. You don’t even need a hardware device to sign transactions, so phoenix is great for paying for coffee, gas, or groceries when you’re out in the real world.
Pros of Phoenix Wallet
The best part of Phoenix is that it’s super easy to get onboarded onto lightning without risking your funds. You keep the seed phrase, but you get to send lightning payments. It’s super easy to set up and then you can play with lightning for instant bitcoin settlement.
Other lightning wallets have the complexity of setting up your own node and managing your own channels or the risk of using a custodial lightning wallet.
Using lighting bitcoin through Phoenix makes using bitcoin much cheaper and faster. The standard fee to open a lightning channel with Phoenix is 1%, so you do a large deposit of 丰1,000,000 sats ($250), you’d be paying just 丰10,000 ($2.50) for the convenience of instant bitcoin settlement (rather than 20 minutes to 1 hour).
Considering that normal lightning channel management requires your time, and may come with the unexpected costs of making mistakes, 1% isn’t a bad price to make sure your lightning payments always go through.
Cons of Phoenix Wallet
There are always tradeoffs, and there definitely are some downsides to Phoenix.
High Fees For Small Deposits
The first issue is that there is a minimum deposit amount and minimum fee, which could really add up if you are depositing small amounts of bitcoin. For example, the minimum deposit is 丰10,000, but the minimum fee to open a lightning channel with Phoenix is 丰3,000. That means you’d be paying a 30% fee to use Phoenix as a lightning wallet, when the fee for something custodial like Wallet of Satoshi would be 0%.
Loss of Privacy
As with all things bitcoin, if you aren’t doing your own work, you’re using someone else’s. Though Phoenix does allow you to use your own node, they are still managing your channels and you’re using their UTXO set. With Phoenix opening and closing lightning channels for you, that means they know where your funds are coming from and where they are going.
It’s A “Lightning First” Wallet
Phoenix is a “lightning first” wallet, meaning it’s optimized for lightning payments. When you deposit funds onto the wallet, they are automatically converted into a lightning channel, which will cost you a fee. Though it’s possible to then swap out and send back to on-chain bitcoin, you’ll have to pay yet another fee to do that. In a low-fee environment, that doesn’t matter much, but seeing how fees are spiking lately, it’s important to pay attention to things like this.
4. Blue Wallet (Mobile App)
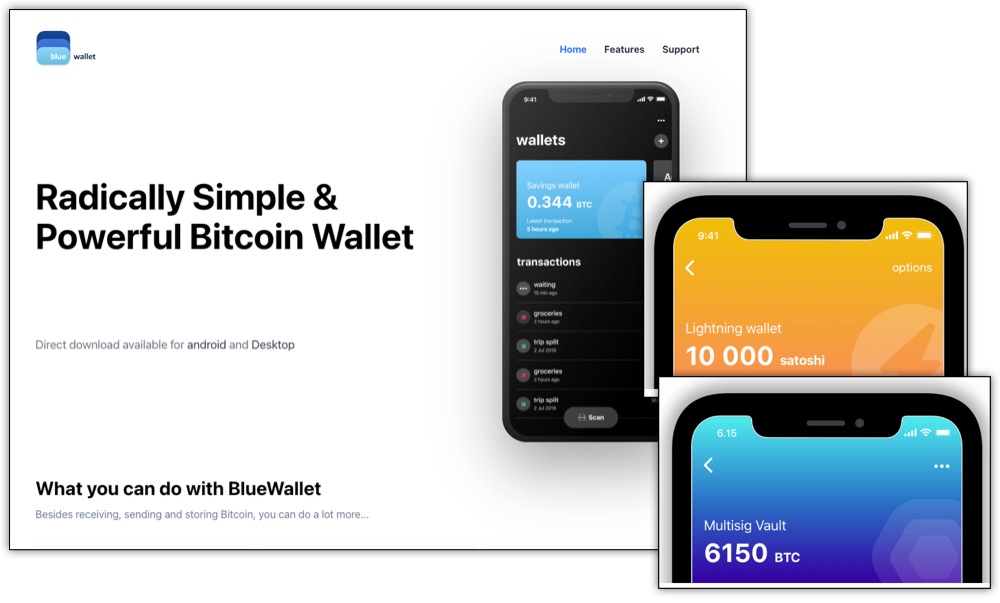
Blue Wallet is an extremely versatile mobile wallet that has been around for many years. Whenever I’m testing a new bitcoin hardware wallet, my default choice to create a “watch only” wallet on mobile is Blue.
Blue Wallet can do a lot, but the basic setup is quite simple. I like Blue Wallet as a beginner wallet because it’s simple to set up and use, but offers lots of optionality as you become more comfortable using bitcoin.
It’s easy to onboard with Blue Wallet. Once you create a “new wallet”, you are given your 12 words to write down (not 24), and you don’t have to go through the song-and-dance about checking your words. Just make sure they’re written down correctly!
From there, you can immediately begin to send and receive bitcoin.
You can easily create multiple wallets for different purposes, including view-only wallets, or a single wallet as part of a multisig quorum. As long as you have a lightning node set up, you can also send and receive lightning payments from within Blue Wallet. This is not a managed lightning wallet like Phoenix, so you will need to do quite a few extra steps to get lightning working on Blue Wallet, but it’s nice to know you can manage both on-chain and lightning wallets within one app.
You can sign/verify messages using your keys as well, which was always a mystery for me as a beginner, but they make it easy with Blue Wallet.
From there, connecting to your own node is as simple as scanning a QR code.
Pros of Blue Wallet
Blue Wallet is open source, and one of the most popular bitcoin wallets, so its code is constantly being reviewed and scrutinized. As a beginner, I usually recommend wallets which are more popular because they are heavily geared towards beginners users and have already gone through many iterations to make them safe to use. Sometimes fancy new wallets have cool features, but haven’t been tested in real world situations.
Blue Wallet allows you to create a non-custodial bitcoin wallet right out of the box. In just a couple clicks, you can have your 12-word seed phrase and be holding the keys to your bitcoin. Alternatively, you can also use Blue Wallet in combination with a hardware wallet, adding an extra layer of protection to your bitcoin. This means that you’d need to sign the transaction with a hardware device that generated keys rather than let Blue Wallet generate keys for you.
One of my favorite aspects of Blue Wallet is that it’s a mobile wallet where you can manage multiple wallets simply by flipping through each one. This helps with organization of funds for different purposes. You can have a key for a multisig wallet, spending cash in an on-chain wallet that requires a hardware signing device, and a pocket change lightning wallet.
Blue Wallet also has a desktop version of the app.
It’s really a versatile wallet that’s great for beginners, but also has options for advanced users, making it a great wallet to use on your bitcoin education journey.
Cons of Blue Wallet
One downside to Blue Wallet is that their lightning wallet feature is an actual full lightning wallet, and they recently removed their custodial wallet option. That means for beginners, you’ll basically be limited to the on-chain bitcoin, and you can use a separate wallet for lightning.
5. Sparrow (Desktop App)
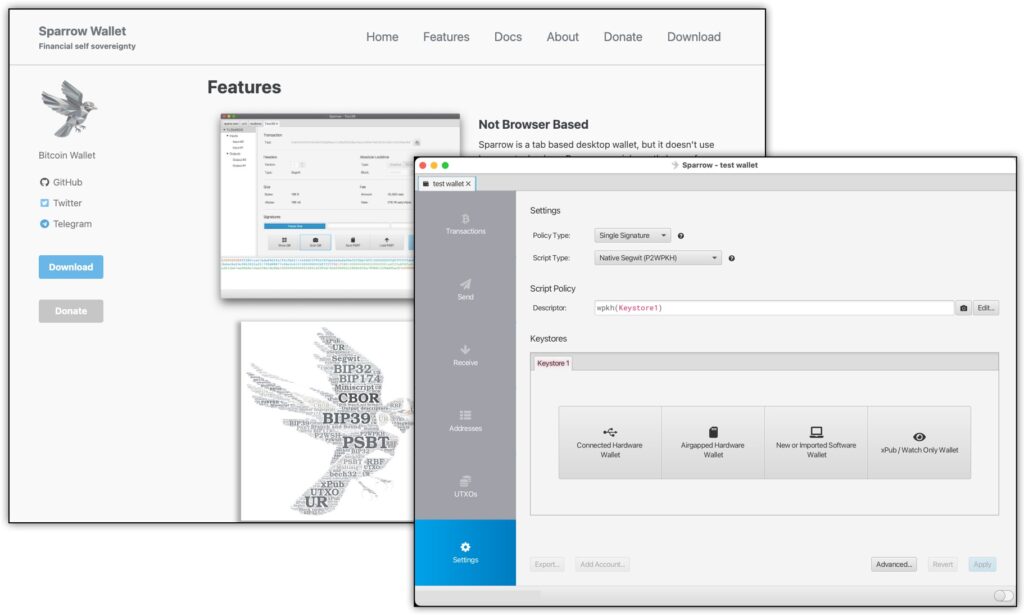
Sparrow Wallet is one of the most feature rich bitcoin software wallets out there, and is a strong contender for the overall best bitcoin wallet for any bitcoiner. Sparrow is very intuitive and user friendly, but still offers the option of advanced features for power users.
Pros of Sparrow Wallet
Sparrow has 90% of features that most power users would enjoy, including multiple wallet types, the ability to connect to ALL of the popular bitcoin-only hardware wallets, coinjoin directly into cold storage, coin control and labeling, RBF, and more.
Sparrow Wallet also has beautiful, intuitive UX. Everything is labeled nicely so you can find your way around the software, as long as you know what you’re looking for!
With Sparrow, you can create a software-only wallet to manage directly on your desktop. This means Sparrow would generate private keys for you. Alternatively, you can use Sparrow as your software, but then manage your keys with a hardware wallet, which is what I recommend.
Cons of Sparrow Wallet
Though I’m listing Sparrow Wallet on my list of best bitcoin wallets for beginners, it’s really a wallet for beginners who know at least a little bit about bitcoin. For a true novice, like freshly a minted bitcoiner, you may find things like the following screenshot confusing:
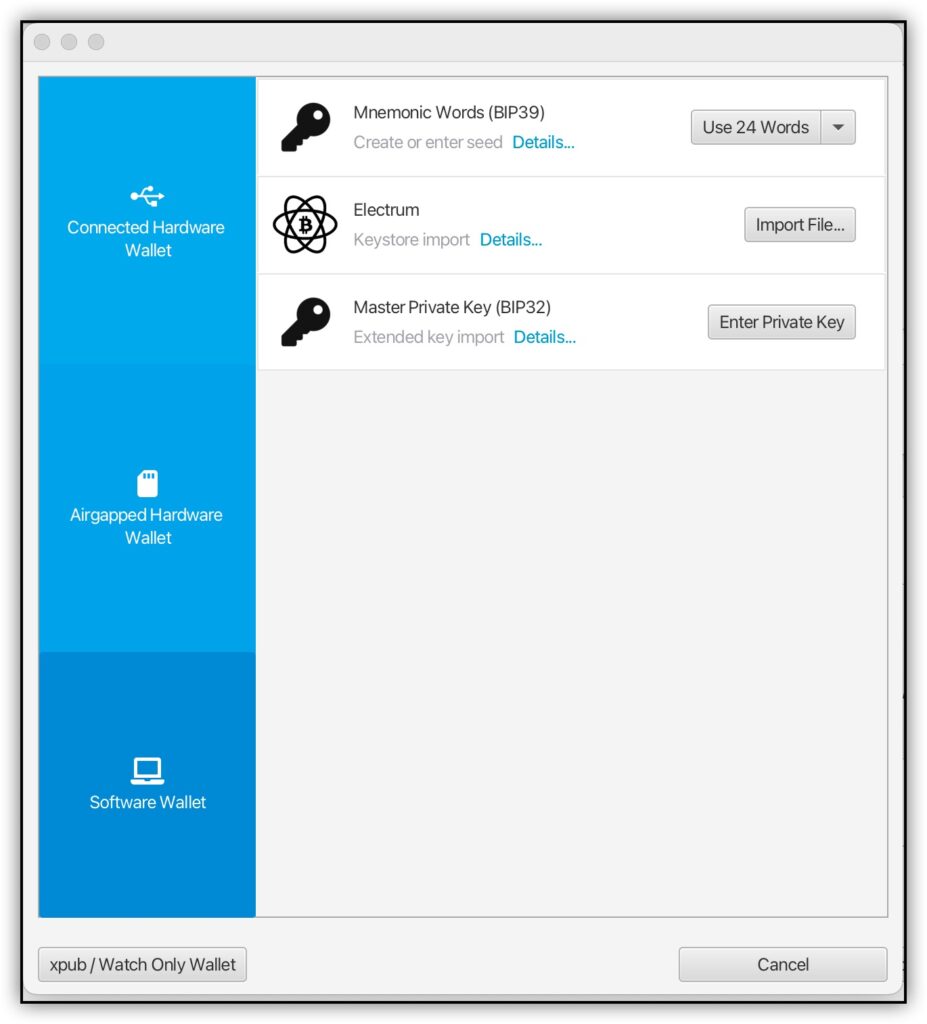
Do you want to connect a hardware wallet, create an airgapped wallet, or create a software wallet? Even a simple step like that could throw a true beginner off.
Of course, there are some really good tutorials on how to use Sparrow on YouTube (and I’ve included one here on this page), but in terms of beginner wallets for bitcoin, this would be rated more like Beginner+.
Another downside to Sparrow is that there’s no mobile version, so even if you learn to use Sparrow effectively, to actually spend bitcoin at local shops you’ll need to find another wallet for mobile.
Why I Don’t Recommend Ledger Wallets
My Personal Experience With Ledger
Ledger makes a few different extremely popular and widely used hardware wallets that come with a very beginner friendly desktop and mobile apps. So why didn’t they make this list?
Ledger is actually a wallet that I would never recommend to friends or family, and I have actively steered friends and family away from using it. As a beginner, I heard a lot about Ledger, and bought a Ledger Nano S about 6 years ago along with my first Trezor One.
After using both for more than a year, I decided to ditch my Ledger for a number of reasons.
The most important reason I stopped using my Ledger hardware wallet is that I found it to be clunky and difficult to use. I mean, it was manageable, but it wasn’t as seamless as my Trezor experience.
There wasn’t anything specific I hated about it, but It was just harder to operate, harder to log into the software, and harder to manage my bitcoin. I didn’t like the Ledger Live software either. That was just my personal experience using it for more than a year.
The Facts Around Ledger Issues
Aside from my own personal bias, in the years since, numerous issues have cropped up around the Ledger company.
The first one is that they had a major security breach and Ledger customer information was compromised. Names and addresses of many Ledger customers was hacked, and some Ledger users even began to receive fake Ledger devices in the mail requesting them to transfer their bitcoin to a “new” (re: compromised) Ledger!
Then, in 2023 they had the bright idea to make it possible to extract your seed information from your device remotely to it can be split between custodians through a service called Ledger Recover. While intended to help people recover their seed phrases in emergency situations, it opens up the possibility of confiscation by governments or even hacks just by offering the option of remote seed extraction.
Though they are actually the most popular “crypto” hardware wallet out there, for bitcoin beginners, I wouldn’t recommend any type of Ledger device. There are so many other great bitcoin wallets for beginners to choose from!
Update: Now there seem to be lots of privacy issues using Ledger Live software.
Which Bitcoin Wallet Should You Choose?
Nobody can tell you the perfect wallet to use for your bitcoin. Ultimately, you are responsible for deciding how to custody your bitcoin. It can be a scary decision if you’ve never self-custodied your bitcoin, but it’s a necessary step to actually owning your bitcoin, rather than owning a bitcoin IOU from an exchange.
That being said, I can certainly my a recommendation to make your choice easier.
Cheapest Hardware Wallet For Beginners
The cheapest, bare bones hardware wallet to get you started is the Trezor One, which cost you only $69. That makes it a great option if you have at least a couple hundred dollars in bitcoin. Always secure your bitcoin as if it was worth 10x its current value, so if you have $500 worth of bitcoin, spending $69 to secure $5,000 is a great value IMO.
I like the Trezor hardware, so despite some downsides discussed by long-time bitcoiners, I think it’s a great bitcoin wallet for beginners. The Trezor Suite app works the same whether you use their entry-level Trezor One or their more advanced Model T.
For an alternative, try the Blockstream Jade and pair it with the Green Wallet (desktop/mobile)
Best Hardware Wallet For Beginners
I think the best hardware wallet for beginners is the Foundation Passport. With a secure element, companion mobile app, and intuitive air gapped signing, it’s hard to beat. There are exactly 7 bitcoin hardware wallets I recommend, each with their own tradeoffs, but gun-to-my-head if I had to pick one for beginners it would be the Passport.
Best On-Chain Mobile Wallet For Beginners
The best on-chain mobile wallet for beginners is Blue Wallet. Setting up your first wallet with 12 words and getting your first receive address can be done in 60 seconds. You can create a practice wallet, mess around for a bit, then set up your real wallet and do everything carefully the second or third time around..
You can use it with a hardware wallet when you want to upgrade. You can create a multisig vault when you want to get serious about stacking larger amounts of bitcoin. Blue Wallet is a perfect bitcoin wallet to grow with you as a bitcoiner.
Best Lightning Wallet For Beginners
The absolute best lightning bitcoin wallet for beginners is Phoenix. You just can’t beat the ease of depositing directly into lightning channels while still being able to hold your own keys. I wouldn’t necessarily use Phoenix for my main stack of bitcoin because it’s a mobile wallet meant for lighting transactions, but for a daily driver with some spending money, it’s my #1 choice for beginners, and for myself as well.







 7 Bitcoin Only Hardware Wallets
Leave a Reply